
Why this matters
Most people should use the installation script. It does everything on this page in one run, it's tested on every release, and it's the quickest way to a working instance. This article is for the cases where you can't or won't run a script as root on a production server: your change process wants to review each command, your hardening baseline already owns Apache or MySQL, or you're building an image and need to know exactly what goes into it.
The steps here follow the script's own order and settings, including the SELinux settings that SLES 16 needs (the script applies them too), and they were run start to finish on a clean SLES 16.1 server for this release. SLES 16 enforces SELinux by default, which SLES 15 doesn't, and a SimpleRisk install that skips Step 6 comes up with a "403 Forbidden" on every page. An install made with an older copy of the script, from before it handled SELinux, shows the same 403 and needs Step 6's commands run by hand.
Three other things set SUSE apart from the other distributions. SLES ships MariaDB, which answers to the name mysql and refuses to coexist with MySQL Community Server, so the MySQL step has to tell the package manager it's allowed to replace it. PHP comes straight from SUSE's own repository, at 8.5 on SLES 16.1, so there's no third-party PHP source to add. And on SUSE several PHP extensions are separate packages, which is why the package list in Step 2 is long.
openSUSE Leap 16.0 follows the same steps. The scripted installer uses one code path for SLES 16 and Leap 16, and Leap 16 ships PHP 8.4, so the version numbers in this article's screenshots differ there. This guide was verified on SLES 16.1; Leap wasn't separately run for it.
Before you start
- SLES 16 (verified on 16.1), on x86_64. The MySQL repository package this uses is built for SLES 15 and has no ARM build, so Graviton and other ARM machines are out. Use at least 2 GB of memory, a static address or a DNS name, and outbound internet access. Sizing guidance is in System Requirements.
- A registered SLES 16 system. A pay-as-you-go cloud image comes registered. On your own machine,
SUSEConnect -sshows whether the system is. SLES 16 has no separate module to enable for PHP; it's in the base repository. - Root. Every command below runs as root. Start a root shell once with
sudo -iand stay in it. - Ports 80 and 443 reachable from the people who'll use SimpleRisk. Step 8 opens them on the server's own firewall. Cloud security groups and network firewalls are yours to adjust.
- A hostname for the instance. Throughout this article, replace
{your-simplerisk-host}with your instance's hostname (for example,grc.example.com). It's a hostname only: nohttps://, no path. - A decision about the TLS certificate. The steps below create a self-signed certificate so the site comes up on HTTPS right away. Browsers will warn about it. Replace it before real users arrive, using HTTPS and TLS Configuration.
- A plan for outgoing email. This guide doesn't set up mail, because the installer doesn't install a mail server on SUSE. Whatever your organization already uses for relaying is yours to configure afterwards.
Step-by-step
0. Update the system and confirm PHP 8 is available
Apply pending updates first. On a fresh cloud image, SUSE's management agents run the package manager for the first few minutes, and a second zypper started meanwhile fails with a lock error. If you hit that, wait a minute and run it again.
zypper -n update
Then confirm PHP 8 is on offer from your repositories.
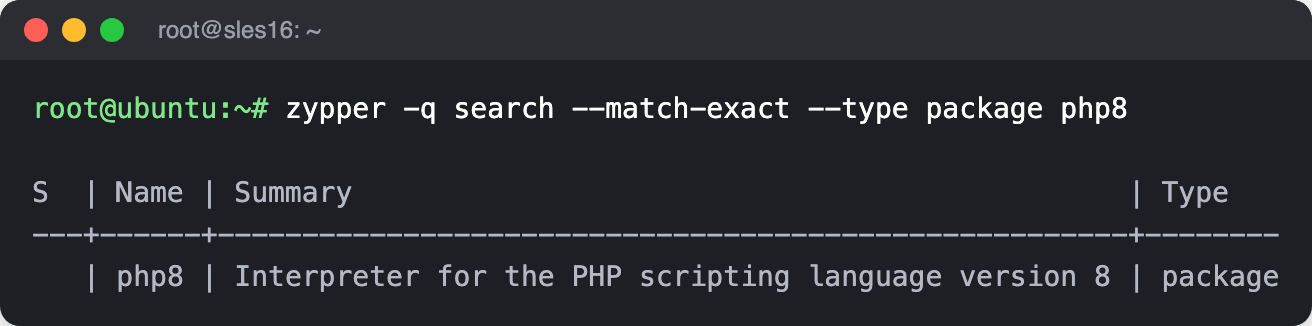
zypper -q search --match-exact --type package php8
You should see php8 listed as a package.
1. Add the MySQL repository
SimpleRisk uses MySQL 8.4 LTS from MySQL's own repository. Download the signing key and compare its fingerprint to the published one before you trust it.
curl -fsSL https://repo.mysql.com/RPM-GPG-KEY-mysql-2025 -o /tmp/mysql-key.asc
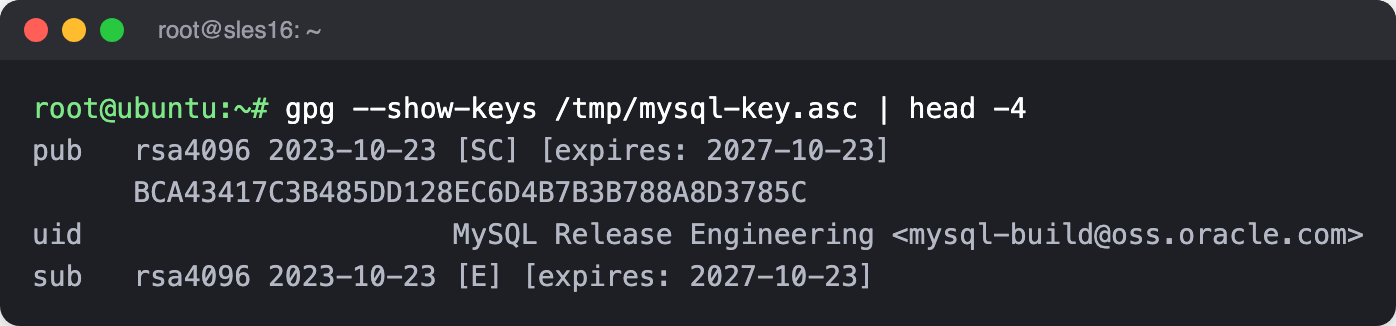
gpg --show-keys /tmp/mysql-key.asc
The first key listed must show the fingerprint BCA4 3417 C3B4 85DD 128E C6D4 B7B3 B788 A8D3 785C (the output prints it without spaces). If it doesn't, stop and delete the file.
Import the key, install MySQL's repository package, make sure the 8.4 repositories are the enabled ones, and refresh.
rpm --import /tmp/mysql-key.asc
rpm -Uvh https://dev.mysql.com/get/mysql84-community-release-sl15-1.noarch.rpm
zypper -n modifyrepo --enable mysql-8.4-lts-community mysql-tools-8.4-lts-community
zypper -n --gpg-auto-import-keys refresh
2. Install Apache, MySQL, and PHP
zypper -n install apache2 iputils
systemctl enable --now apache2
zypper -n install --allow-vendor-change --force-resolution 'mysql-community-server<9'
systemctl enable --now mysql
zypper -n install php8 php8-cli php8-fileinfo php8-mysql apache2-mod_php8 php8-ldap php8-curl \
  php8-zlib php8-phar php8-mbstring php8-intl php8-posix php8-gd php8-zip php8-dom php8-openssl \
  php8-tokenizer php8-ctype php8-xmlreader php8-xmlwriter
Three of those lines deserve a word. iputils provides the ping command that asset discovery uses. The MySQL install carries --allow-vendor-change --force-resolution because that's how you tell the package manager to swap MariaDB for MySQL, and the <9 keeps you on the 8.4 LTS line even if a newer repository is enabled later. In the PHP list, php8-cli is its own package on SUSE, and the cron job in Step 7 needs it. The dom, openssl, tokenizer, ctype, xmlreader, and xmlwriter packages are there for single sign-on (SAML) and the framework underneath it; leave them out and SAML breaks, and the health check only notices dom.
Turn on the three Apache modules SimpleRisk needs. SUSE's a2enmod takes one module per command, so run it three times.
a2enmod php8
a2enmod rewrite
a2enmod ssl
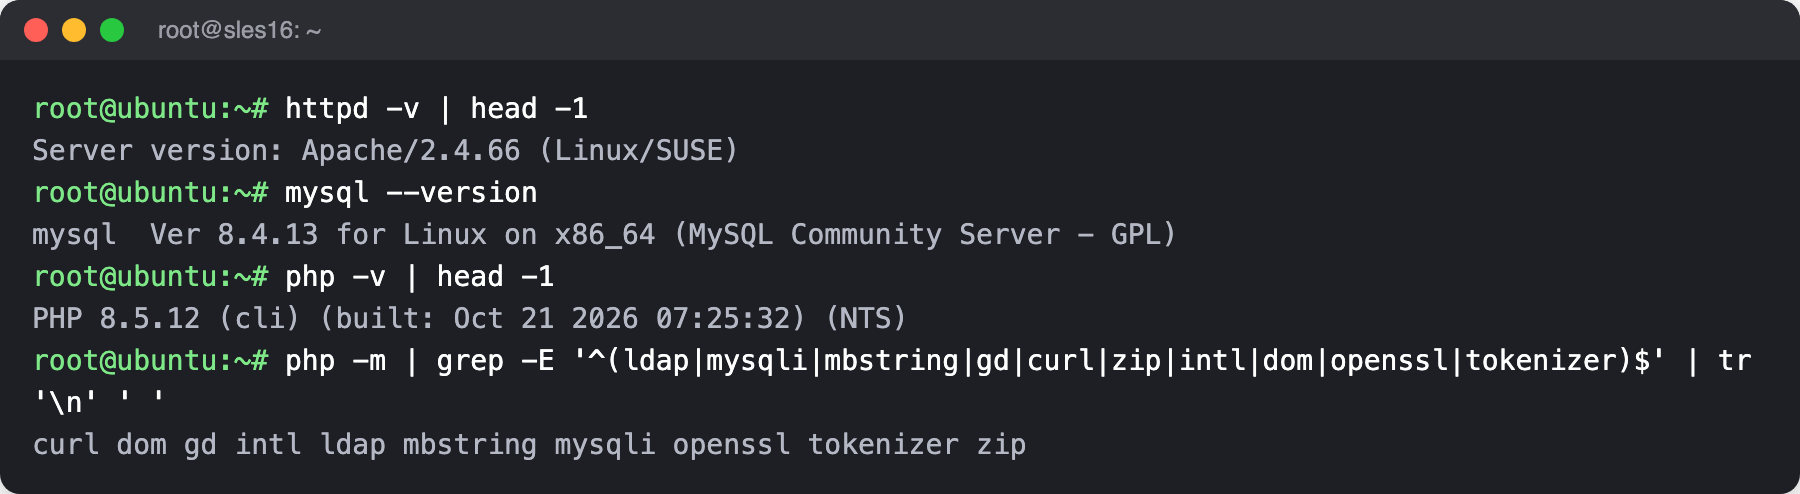
Check what you got.
httpd -v | head -1
mysql --version
php -v | head -1
php -m | grep -E '^(ldap|mysqli|mbstring|gd|curl|zip|intl|dom|openssl|tokenizer)$' | tr '\n' ' '
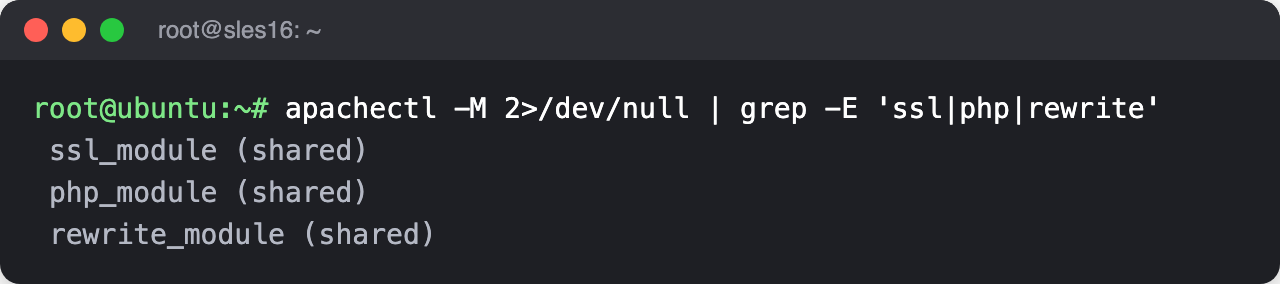
apachectl -M 2>/dev/null | grep -E 'ssl|php|rewrite'
The last command lists the three Apache modules the site depends on; ssl_module, php_module and rewrite_module should all appear.
3. Set the PHP limits
The script sets a 5 MB upload limit, a 256 MB memory limit, and room for 3,000 input variables. The last one matters on pages that post many fields at once, because PHP drops any field past the limit. It also points PHP at SUSE's certificate bundle and MySQL's socket, both of which live in different places than PHP expects. Without the certificate path, PHP's web requests (update checks, for example) fail certificate verification.
PHPINI=/etc/php8/apache2/php.ini
sed -i 's/^\(upload_max_filesize =\).*/\1 5M/; s/^\(memory_limit =\).*/\1 256M/; s/^;\?\(max_input_vars =\).*/\1 3000/' "$PHPINI"
sed -i 's|;*\s*curl\.cainfo\s*=.*|curl.cainfo = /etc/ssl/ca-bundle.pem|; s|;*\s*openssl\.cafile\s*=.*|openssl.cafile = /etc/ssl/ca-bundle.pem|' "$PHPINI"
sed -i 's|\(mysqli.default_socket\).*|\1=/var/lib/mysql/mysql.sock|; s|\(pdo_mysql.default_socket\).*|\1=/var/lib/mysql/mysql.sock|' "$PHPINI"
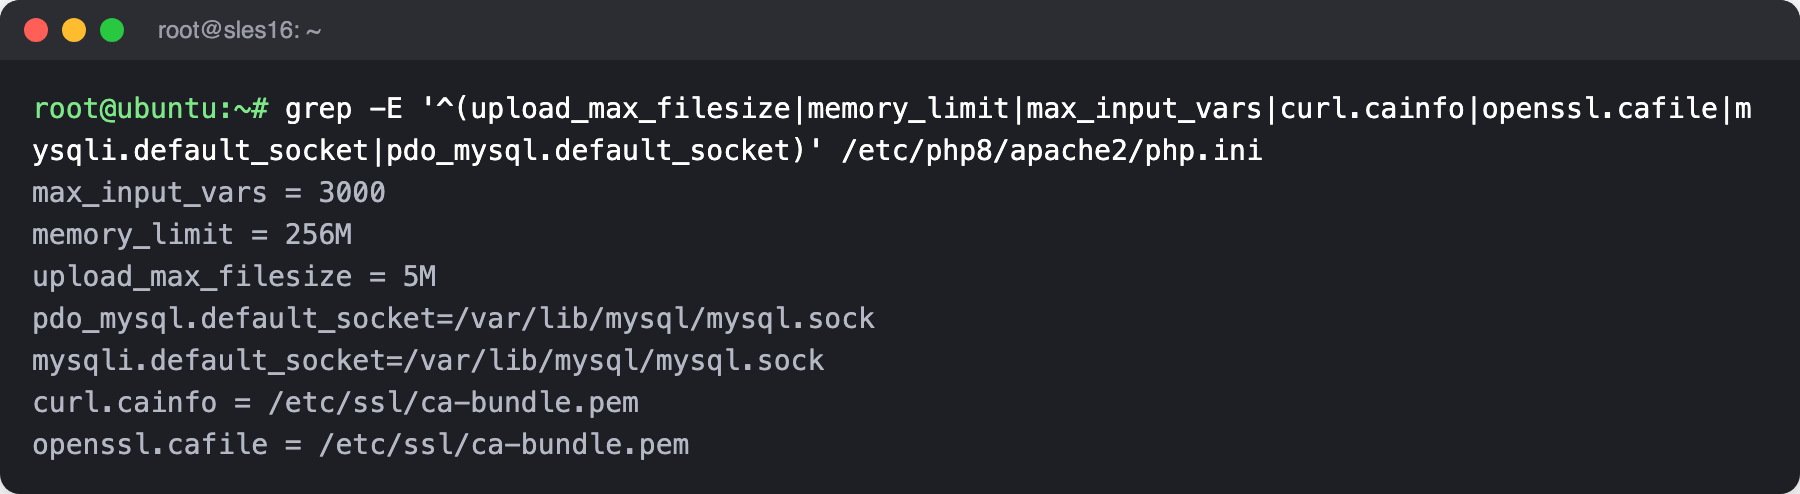
grep -E '^(upload_max_filesize|memory_limit|max_input_vars|curl.cainfo|openssl.cafile|mysqli.default_socket|pdo_mysql.default_socket)' "$PHPINI"
The grep should print all seven values. If one is missing, the file has a different layout than expected and you'll need to set it by hand.
4. Download SimpleRisk and verify it
SimpleRisk publishes the current version and the checksum of each download in one small file. Read the version and both checksums from it, download, and check. SUSE has no /var/www until you create it.
RELEASES=$(curl -fsSL https://updates.simplerisk.com/releases.xml)
VERSION=$(printf '%s' "$RELEASES" | grep -oP '

   \K[^<]+' | head -n1) DB_SHA=$(printf '%s' "$RELEASES" | sed -n '/

    /,/<\/en>/p' | grep -oP '

     \K[^<]+' | head -n1) echo "Installing SimpleRisk $VERSION"
Download the application bundle, check it, and unpack it.
mkdir -p /var/www
cd /var/www
wget "https://simplerisk-downloads.s3.amazonaws.com/public/bundles/simplerisk-${VERSION}.tgz"
echo "${BUNDLE_SHA}  simplerisk-${VERSION}.tgz" | sha256sum -c -
tar -xzf "simplerisk-${VERSION}.tgz"
rm "simplerisk-${VERSION}.tgz"
sha256sum must print OK. If it prints FAILED, delete the file and start again; don't unpack it. Download the English database file the same way.
wget -O /var/www/simplerisk/database.sql \
  "https://github.com/simplerisk/database/raw/master/simplerisk-en-${VERSION}.sql"
echo "${DB_SHA}  /var/www/simplerisk/database.sql" | sha256sum -c -
Both checks print OK, with the version you downloaded in the first filename.

Create the configuration file from the sample, and give the web server's account ownership of the application directory. On SUSE that account is wwwrun.
cp /var/www/simplerisk/includes/config.sample.php /var/www/simplerisk/includes/config.php
chown -R wwwrun: /var/www/simplerisk
5. Create the database and connect SimpleRisk to it
Add MySQL's settings to its configuration file: the SQL mode (the script sets NO_ENGINE_SUBSTITUTION only, which drops the strict defaults, and SimpleRisk is built and tested against that), and a password policy for any password set later.
cat >> /etc/my.cnf <<'EOF'

[mysqld]
sql_mode=NO_ENGINE_SUBSTITUTION
loose-validate_password.policy=MEDIUM
loose-validate_password.length=20
loose-validate_password.mixed_case_count=1
loose-validate_password.number_count=1
loose-validate_password.special_char_count=0
loose-validate_password.check_user_name=ON
EOF
MySQL on SUSE starts with a temporary root password, which it writes to its log the first time it runs, and expires it immediately. You have to use it once to set a real one. Generate two strong passwords (one for root, one for SimpleRisk's own database user), read the temporary one from the log, and set the root password. The generator below produces 51 characters with upper- and lower-case letters, digits, and a special character, which satisfies the policy above.
genpw() { echo "$(openssl rand -hex 12)Aa#$(openssl rand -hex 12)"; }
ROOTPASS=$(genpw); DBPASS=$(genpw)
TEMP=$(grep 'temporary password' /var/log/mysql/mysqld.log | awk '{print $NF}' | tail -n1)
mysql -uroot -p"$TEMP" --connect-expired-password -e "ALTER USER 'root'@'localhost' IDENTIFIED BY '${ROOTPASS}'"
Save both passwords somewhere only root can read. The script keeps them in /root/passwords.txt; do the same, then move them to your password manager and delete the file.
umask 077
{ echo "MYSQL ROOT PASSWORD: ${ROOTPASS}"; echo "MYSQL SIMPLERISK PASSWORD: ${DBPASS}"; } > /root/passwords.txt
umask 022
Create the database and a dedicated user, import the schema, and grant the user the permissions SimpleRisk needs. Setting MYSQL_PWD lets the mysql client use the root password without it appearing in each command; you'll unset it when you're done.
export MYSQL_PWD="$ROOTPASS"
mysql -uroot -e "CREATE DATABASE simplerisk"
mysql -uroot -e "CREATE USER 'simplerisk'@'localhost' IDENTIFIED BY '${DBPASS}'"
mysql -uroot simplerisk < /var/www/simplerisk/database.sql
mysql -uroot -e "GRANT SELECT, INSERT, UPDATE, DELETE, CREATE, DROP, REFERENCES, INDEX, ALTER ON simplerisk.* TO 'simplerisk'@'localhost'"
Write the connection details into the configuration file, delete the schema file (it has no further use), restart MySQL so the settings from /etc/my.cnf take effect, and clear the password from your environment.
sed -i "s/\(DB_HOSTNAME', '\)__DB_HOSTNAME__/\1127.0.0.1/; s/\(DB_PORT', '\)__DB_PORT__/\13306/; s/\(DB_USERNAME', '\)__DB_USERNAME__/\1simplerisk/; s/\(DB_PASSWORD', '\)__DB_PASSWORD__/\1${DBPASS}/; s/\(DB_DATABASE', '\)__DB_DATABASE__/\1simplerisk/; s/\(USE_DATABASE_FOR_SESSIONS', '\)__USE_DATABASE_FOR_SESSIONS__/\1true/" \
  /var/www/simplerisk/includes/config.php
rm /var/www/simplerisk/database.sql
systemctl restart mysql
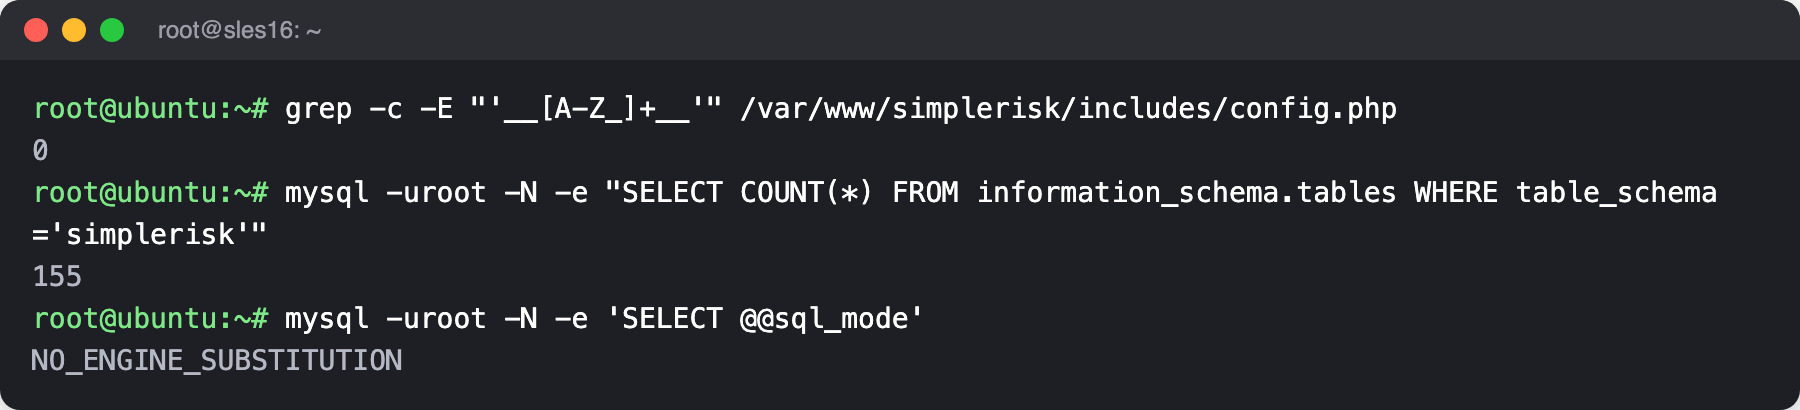
grep -c -E "'__[A-Z_]+__'" /var/www/simplerisk/includes/config.php
mysql -uroot -N -e "SELECT COUNT(*) FROM information_schema.tables WHERE table_schema='simplerisk'"
mysql -uroot -N -e 'SELECT @@sql_mode'
unset MYSQL_PWD
The first check should print 0, meaning no __PLACEHOLDER__ value is left in the file. The second prints a table count above zero (155 when this guide was verified), which means the import ran. The third should print NO_ENGINE_SUBSTITUTION, which confirms MySQL read your settings.
6. Point Apache at SimpleRisk
Create a certificate for HTTPS, valid for a year. The key stays readable only by root, because Apache reads it before it drops privileges.
mkdir -p /etc/apache2/ssl.key /etc/apache2/ssl.crt
openssl req -x509 -newkey rsa:2048 -nodes -days 365 -subj /CN=simplerisk \
  -keyout /etc/apache2/ssl.key/simplerisk.key -out /etc/apache2/ssl.crt/simplerisk.crt
chmod 600 /etc/apache2/ssl.key/simplerisk.key
Add one site that serves SimpleRisk over HTTP and sends every request to HTTPS, and one that serves it over HTTPS. SimpleRisk relies on .htaccess files to protect its own directories, so each site turns AllowOverride on and switches off directory listings.
cat > /etc/apache2/vhosts.d/simplerisk.conf <<'EOF'
Listen 443


    DocumentRoot "/var/www/simplerisk/"

     AllowOverride All Require all granted Options -Indexes Options FollowSymLinks
    RewriteEngine On RewriteCond %{HTTPS} !=on RewriteRule ^/?(.*) https://%{SERVER_NAME}/$1 [R,L]

EOF
cat > /etc/apache2/vhosts.d/ssl.conf <<'EOF'


    DocumentRoot "/var/www/simplerisk/"

     AllowOverride All Require all granted Options -Indexes Options FollowSymLinks
    SSLEngine on SSLCertificateFile /etc/apache2/ssl.crt/simplerisk.crt SSLCertificateKeyFile /etc/apache2/ssl.key/simplerisk.key

EOF
Restrict Apache to TLS 1.2, then create the log directory SimpleRisk writes its application log to. The directory belongs to the web server's account, with no access for anyone else.
sed -i 's/\(SSLProtocol\).*/\1 TLSv1.2/' /etc/apache2/ssl-global.conf
mkdir -p /var/log/simplerisk
touch /var/log/simplerisk/simplerisk.log
chown -R wwwrun: /var/log/simplerisk
chmod 750 /var/log/simplerisk
chmod 640 /var/log/simplerisk/simplerisk.log
SLES 16 runs SELinux in enforcing mode. Out of the box, Apache isn't allowed to read the files in /var/www (the directory is created with a generic label), and it isn't allowed to open the network connection SimpleRisk uses to reach MySQL. Without the next block you get a 403 on every page, and once that's fixed, a "Database connection failed" error in the application log. Label the application directory as writable web content and the log directory as a web log directory, then allow Apache to make network connections. Using semanage records the labels, so they survive a full relabel of the filesystem.
semanage fcontext -a -t httpd_sys_rw_content_t '/var/www/simplerisk(/.*)?'
semanage fcontext -a -t httpd_log_t '/var/log/simplerisk(/.*)?'
restorecon -R /var/www/simplerisk /var/log/simplerisk
setsebool -P httpd_can_network_connect=1
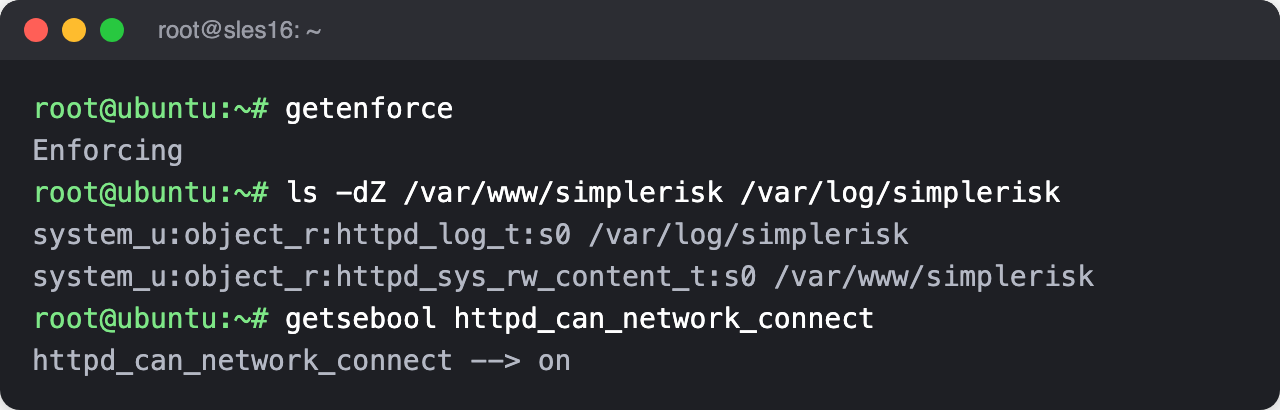
getenforce
ls -dZ /var/www/simplerisk /var/log/simplerisk
getsebool httpd_can_network_connect
getenforce should print Enforcing (leave it that way), the two directories should show the labels above, and the boolean should read on.
Test the configuration, then restart Apache.
apachectl configtest
systemctl restart apache2
configtest must end with Syntax OK. If it doesn't, read the message before restarting, because a failed restart takes the site down.

7. Install cron and schedule the job
Install the cron daemon. Without it the schedule below is written but never runs.
zypper -n install cron
systemctl enable --now cron
The scheduled job runs every minute as the web server's account, never as root. It's what sends notifications, runs queued background work, and takes backups, so a missing job shows up as features that quietly never fire. See The Cron Jobs for what it does.
echo "* * * * * wwwrun $(which php) -f /var/www/simplerisk/cron/cron.php" > /etc/cron.d/simplerisk
chmod 644 /etc/cron.d/simplerisk
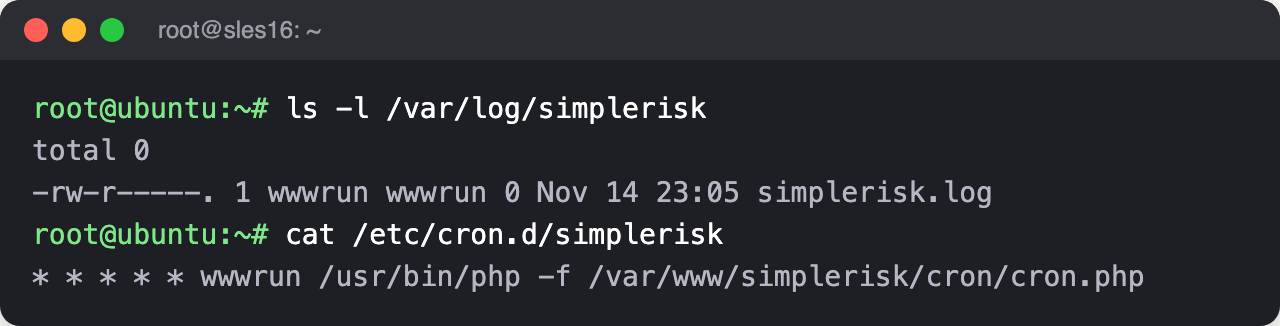
Confirm both are in place.
ls -l /var/log/simplerisk
cat /etc/cron.d/simplerisk
8. Open the firewall
SLES uses firewalld. Install it and start it, then wait until it answers. SSH is already allowed in the default zone on a fresh install; the loop names it anyway so the rules can't cut off your own session.
zypper -n install firewalld
systemctl enable --now firewalld
until firewall-cmd --state >/dev/null 2>&1; do sleep 1; done
for service in http https ssh; do firewall-cmd --permanent --zone=public --add-service=$service; done
firewall-cmd --reload
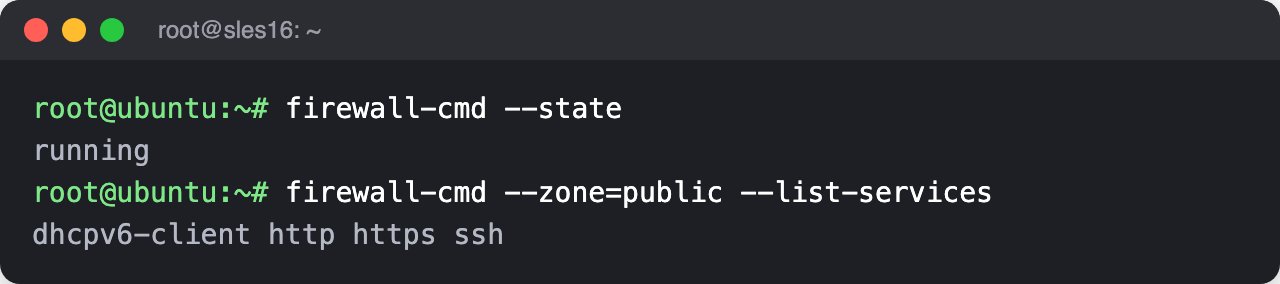
firewall-cmd --state
firewall-cmd --zone=public --list-services
The state should read running, and the service list should include ssh, http, and https.
9. Check the install, then finish in the browser
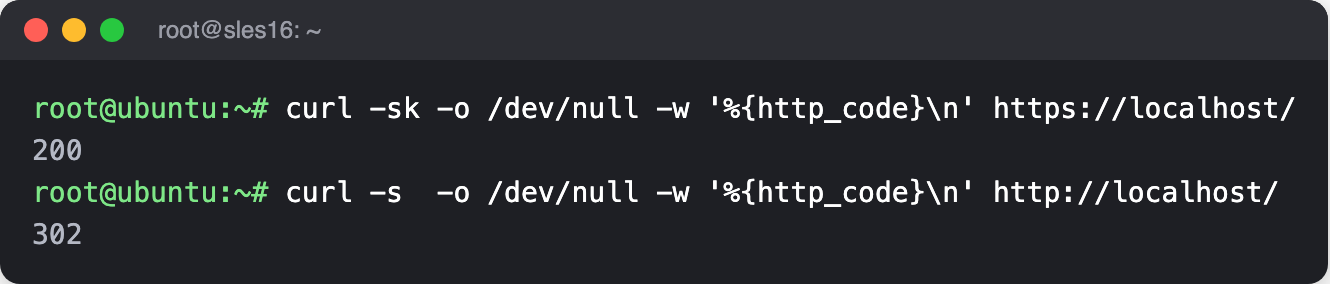
From the server, confirm both ports answer. The -k accepts the self-signed certificate.
curl -sk -o /dev/null -w '%{http_code}\n' https://localhost/
curl -s  -o /dev/null -w '%{http_code}\n' http://localhost/
The first should print 200 and the second a redirect code such as 302.
Now open https://{your-simplerisk-host}/ in a browser. It will warn that the certificate isn't trusted, because of the self-signed certificate; accept it for now and replace the certificate when you reach HTTPS and TLS Configuration.
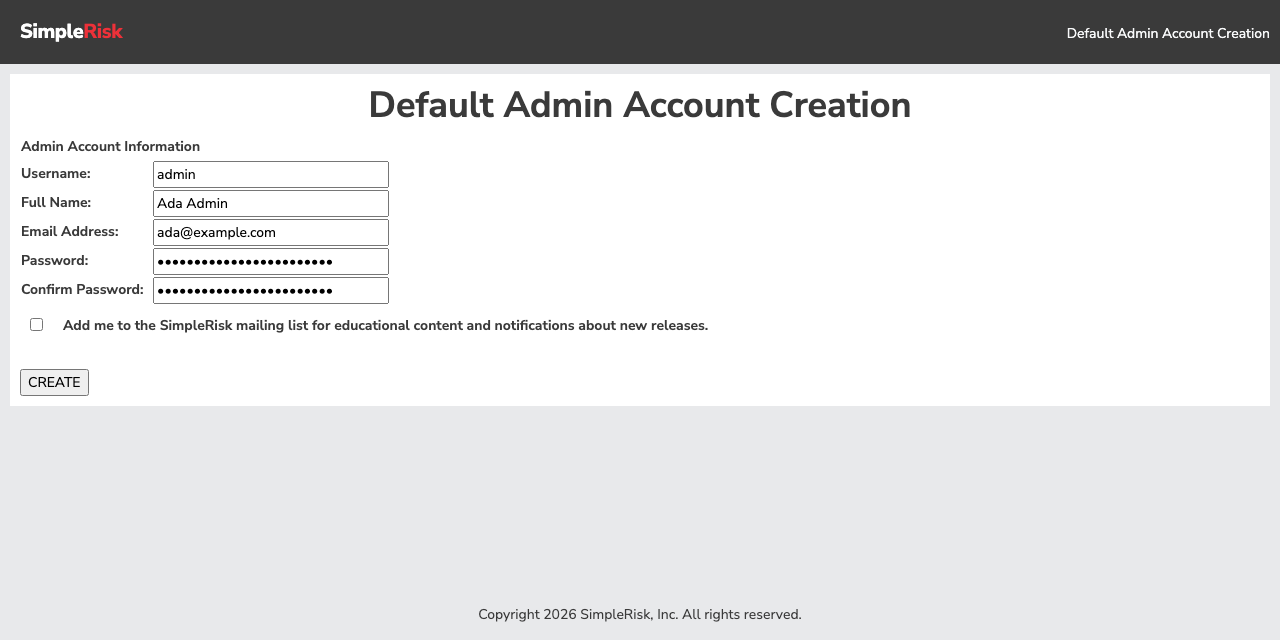
You won't see the installation wizard described in The Initial Configuration Wizard. The database and config.php are already in place, so SimpleRisk goes straight to creating the first administrator. Enter a username, your full name, an email address, and a strong password, twice. The mailing-list box is optional and starts unticked. Select CREATE.
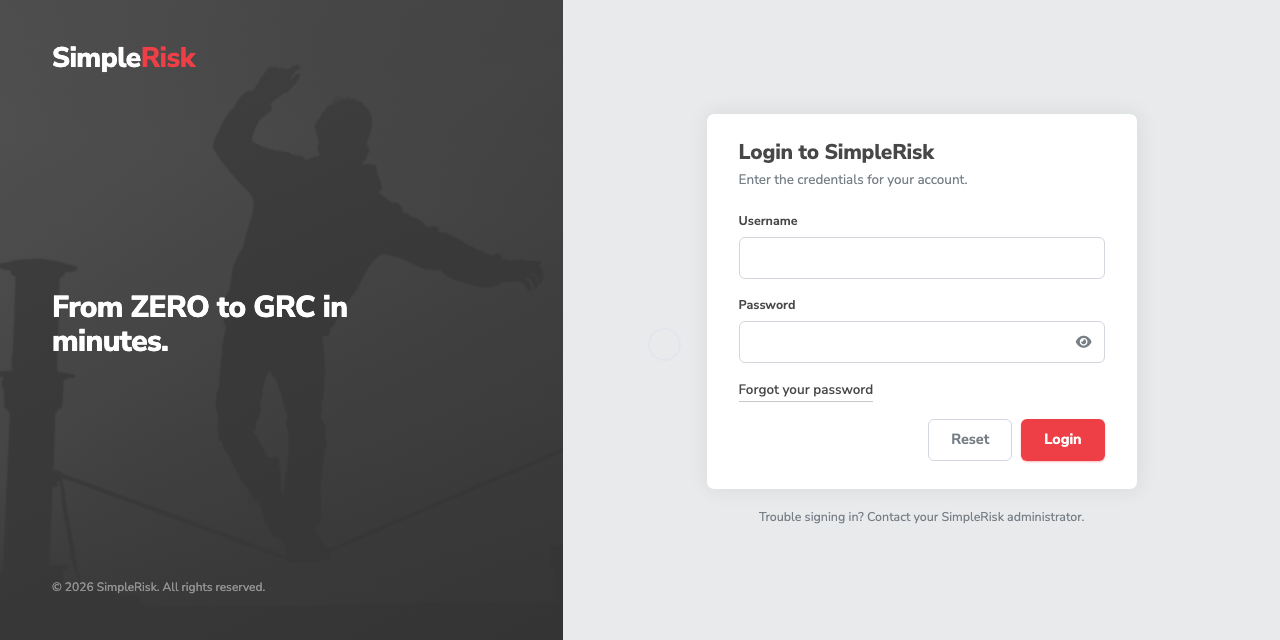
SimpleRisk then shows the login page. Sign in with the account you just created.
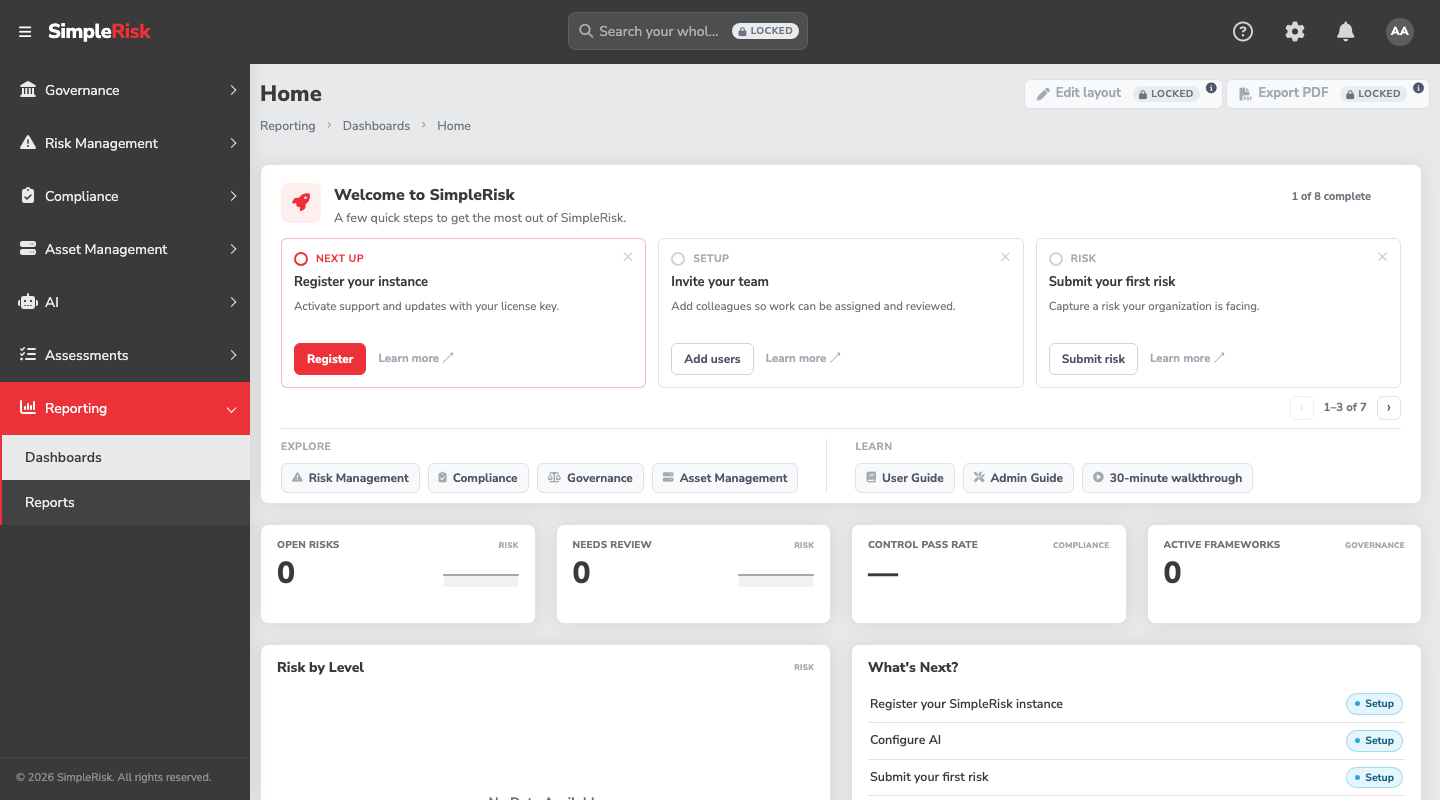
You land on the Home dashboard, with a Welcome to SimpleRisk card that lists the first steps. The counters read zero because nothing has been entered yet.
From here, register the instance so it can receive updates, following Registration and Licensing.
Common pitfalls
- Running the commands as a normal user with
sudoin front of only some of them. A redirect like> /etc/cron.d/simpleriskhappens in your shell, beforesudoapplies, and fails with "permission denied". Use one root shell for the whole article. - Installing MySQL without the vendor-change flags. The package manager stops with a conflict between
mysql-community-serverand MariaDB, and under-nit gives up. The flags in Step 2 are the fix. - Giving
a2enmodseveral modules at once. On SUSE it processes only the first and says nothing about the rest, so Apache starts later with an "invalid commandRewriteEngine" error. Run it once per module. - Trying
cd /var/wwwon a fresh server. SUSE doesn't create it; Apache's default root is/srv/www. Step 4 creates/var/wwwbefore using it. - Skipping the SELinux step, or turning SELinux off to get past it. A 403 on every page, or "Database connection failed: Permission denied" in
/var/log/simplerisk/simplerisk.log, means a label or the network boolean is missing. Fix the labels; don't switch SELinux to permissive on a server that will hold risk data. - Leaving the temporary MySQL password unused. It expires at once, and every
mysqlcommand fails with "password has expired" until you change it with--connect-expired-password. - Looking for the installation wizard. A manual install skips it, as the last step explains. The first thing you'll see is the administrator form.
- Uninstalling by deleting
/var/www/simplerisk. The scheduled job from Step 7 keeps firing every minute and will recreate the log directory behind you. Remove/etc/cron.d/simpleriskfirst.