
Why this matters
Most people should use the installation script. It does everything on this page in one run, it's tested on every release, and it's the quickest way to a working instance. This article is for the cases where you can't or won't run a script as root on a production server: your change process wants to review each command, your hardening baseline already owns Apache or MySQL, or you're building an image and need to know exactly what goes into it.
The steps here follow the script's own order and settings, and they were run start to finish on a clean Debian 13 server for this release. If something here and the script ever disagree, the script wins, because it's the thing CI exercises.
One decision up front. The script adds two third-party package repositories, and this guide does too: Sury for PHP 8.5, and Oracle's MySQL 8.4 LTS repository for the database. Debian's own repositories carry PHP 8.4 and MariaDB, and no Oracle MySQL. SimpleRisk supports MySQL only, as System Requirements explains, so the MySQL repository isn't optional unless you bring your own MySQL 8.x.
Before you start
- A Debian 13 (trixie) machine with at least 2 GB of memory, a static address or a DNS name, and outbound internet access. Sizing guidance is in System Requirements.
- A root shell. Every command below runs as root. Log in as root, or start a root shell once with
sudo -i(orsu -on a server withoutsudo) and stay in it. - Ports 80 and 443 reachable from the people who'll use SimpleRisk. Step 8 opens them on the server's own firewall. Cloud security groups and network firewalls are yours to adjust.
- A hostname for the instance. Throughout this article, replace
{your-simplerisk-host}with your instance's hostname (for example,grc.example.com). It's a hostname only: nohttps://, no path. - A decision about the TLS certificate. The steps below leave Debian's self-signed "snakeoil" certificate in place so the site comes up on HTTPS right away. Browsers will warn about it. Replace it before real users arrive, using HTTPS and TLS Configuration.
Step-by-step
1. Add the PHP and MySQL repositories
Install the tools needed to fetch and check the repository keys.
apt-get update
apt-get install -y gnupg curl ca-certificates lsb-release
Download the repository's signing key and compare its fingerprint to the published one before you trust it.
mkdir -p /etc/apt/keyrings
curl -fsSL https://packages.sury.org/php/apt.gpg -o /etc/apt/keyrings/sury-php.gpg
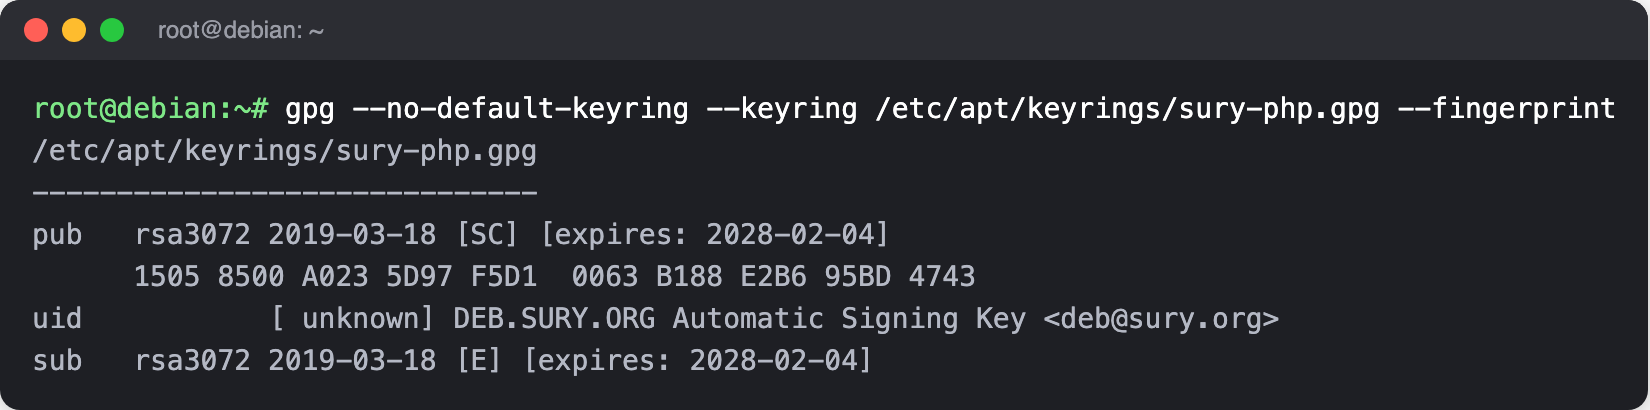
gpg --no-default-keyring --keyring /etc/apt/keyrings/sury-php.gpg --fingerprint
The fingerprint must read 1505 8500 A023 5D97 F5D1 0063 B188 E2B6 95BD 4743. If it doesn't, stop and delete the file. Everything after this step installs software that this key vouches for.
echo "deb [signed-by=/etc/apt/keyrings/sury-php.gpg] https://packages.sury.org/php/ $(lsb_release -sc) main" \
  > /etc/apt/sources.list.d/sury-php.list
Now the database. Download Oracle's signing key, convert it to the format apt reads, and look at its fingerprint.
curl -fsSL https://repo.mysql.com/RPM-GPG-KEY-mysql-2025 | gpg --dearmor -o /etc/apt/trusted.gpg.d/mysql.gpg
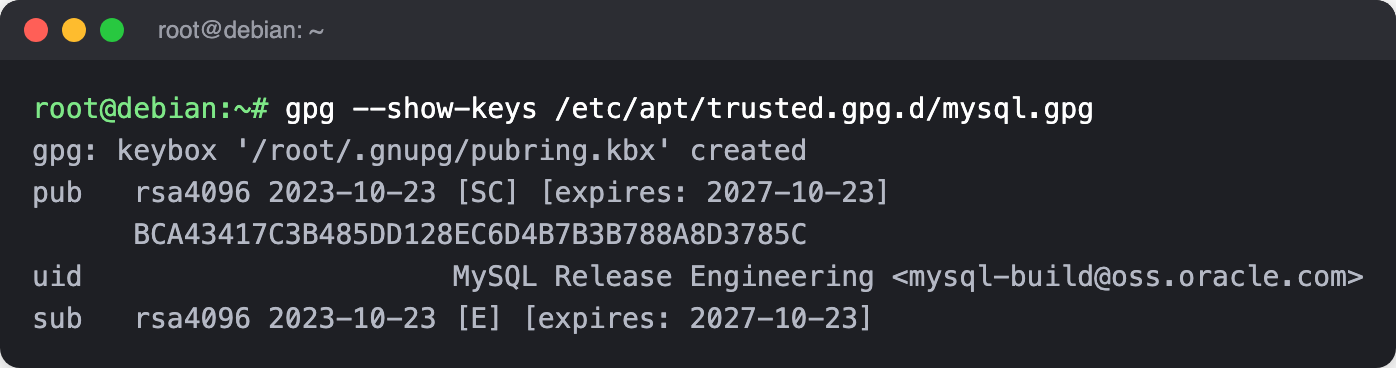
gpg --show-keys /etc/apt/trusted.gpg.d/mysql.gpg
The first time gpg runs it may print a line saying it created its keybox. That's normal. The fingerprint must read BCA43417C3B485DD128EC6D4B7B3B788A8D3785C. The script pins the last sixteen characters of that, B7B3B788A8D3785C, which MySQL publishes on its package verification page. Same rule as before: if it doesn't match, delete the file and stop.
Add the repository, pinned to the 8.4 long-term-support series, then refresh the package lists.
echo "deb [signed-by=/etc/apt/trusted.gpg.d/mysql.gpg] https://repo.mysql.com/apt/debian/ $(lsb_release -sc) mysql-8.4-lts" \
  > /etc/apt/sources.list.d/mysql.list
apt-get update
2. Install Apache, MySQL, and PHP
apt-get install -y apache2 mysql-server \
  php8.5 libapache2-mod-php8.5 php8.5-mysql php8.5-xml php8.5-mbstring \
  php8.5-ldap php8.5-curl php8.5-gd php8.5-zip php8.5-intl php8.5-dev \
  cron iputils-ping
phpenmod ldap
a2enmod rewrite ssl
a2ensite default-ssl
cron runs SimpleRisk's scheduled work in Step 7, and iputils-ping provides the ping command that asset discovery uses. The script also installs the PHP development headers (php8.5-dev), so this list does too. The ldap module is enabled whether or not you use directory sign-in, because SimpleRisk's requirements list it.
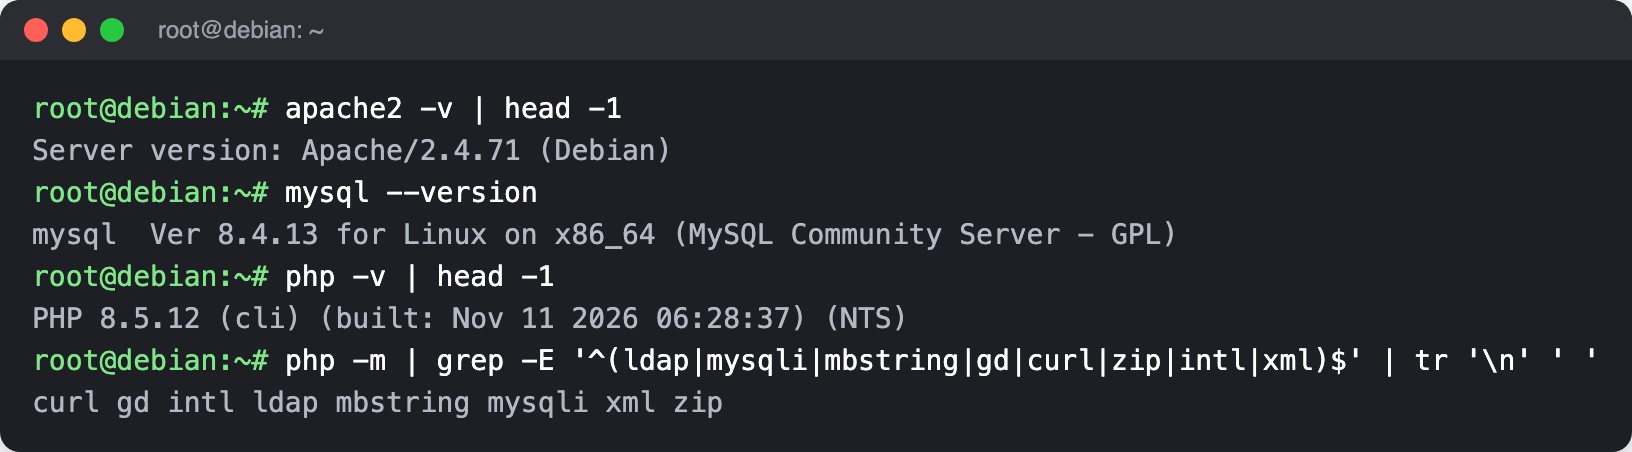
Check what you got. Debian 13 supplies Apache 2.4; MySQL comes from the MySQL repository and PHP from Sury, so you should see MySQL 8.4 and PHP 8.5.
apache2 -v | head -1
mysql --version
php -v | head -1
php -m | grep -E '^(ldap|mysqli|mbstring|gd|curl|zip|intl|xml)$' | tr '\n' ' '
3. Set the PHP limits
The script sets a 5 MB upload limit, a 256 MB memory limit, and room for 3,000 input variables. The last one matters on pages that post many fields at once, because PHP drops any field past the limit.
sed -i 's/^\(upload_max_filesize =\).*/\1 5M/; s/^\(memory_limit =\).*/\1 256M/; s/^;\?\(max_input_vars =\).*/\1 3000/' \
  /etc/php/8.5/apache2/php.ini
grep -E '^(upload_max_filesize|memory_limit|max_input_vars) =' /etc/php/8.5/apache2/php.ini
The grep should print the three values you just set. If one is missing, the file has a different layout than expected and you'll need to set it by hand.

4. Download SimpleRisk and verify it
SimpleRisk publishes the current version and the checksum of each download in one small file. Read the version and both checksums from it, download, and check.
RELEASES=$(curl -fsSL https://updates.simplerisk.com/releases.xml)
VERSION=$(printf '%s' "$RELEASES" | grep -oP '

   \K[^<]+' | head -n1) DB_SHA=$(printf '%s' "$RELEASES" | sed -n '/

    /,/<\/en>/p' | grep -oP '

     \K[^<]+' | head -n1) echo "Installing SimpleRisk $VERSION"
Download the application bundle, check it, and unpack it into /var/www.
cd /var/www
wget "https://simplerisk-downloads.s3.amazonaws.com/public/bundles/simplerisk-${VERSION}.tgz"
echo "${BUNDLE_SHA}  simplerisk-${VERSION}.tgz" | sha256sum -c -
tar -xzf "simplerisk-${VERSION}.tgz"
rm "simplerisk-${VERSION}.tgz"
sha256sum must print OK. If it prints FAILED, delete the file and start again; don't unpack it. Download the English database file the same way.
wget -O /var/www/simplerisk/database.sql \
  "https://github.com/simplerisk/database/raw/master/simplerisk-en-${VERSION}.sql"
echo "${DB_SHA}  /var/www/simplerisk/database.sql" | sha256sum -c -
Both checks print OK, with the version you downloaded in the first filename.

Create the configuration file from the sample, and give the web server's account ownership of the application directory.
cp /var/www/simplerisk/includes/config.sample.php /var/www/simplerisk/includes/config.php
chown -R www-data: /var/www/simplerisk
5. Create the database and connect SimpleRisk to it
The script sets MySQL's SQL mode to NO_ENGINE_SUBSTITUTION only, which drops the strict defaults. Match it: SimpleRisk is built and tested against that setting.
echo 'sql-mode="NO_ENGINE_SUBSTITUTION"' >> /etc/mysql/mysql.conf.d/mysqld.cnf
systemctl restart mysql
On Debian, MySQL installed from MySQL's repository lets root in over the local socket without a password, so mysql works as-is from your root shell. Create the database and a dedicated user with a generated password, import the schema, and grant the user the permissions SimpleRisk needs.
DBPASS=$(openssl rand -hex 24)
mysql -e "CREATE DATABASE simplerisk"
mysql -e "CREATE USER 'simplerisk'@'localhost' IDENTIFIED BY '${DBPASS}'"
mysql simplerisk < /var/www/simplerisk/database.sql
mysql -e "GRANT SELECT, INSERT, UPDATE, DELETE, CREATE, DROP, REFERENCES, INDEX, ALTER ON simplerisk.* TO 'simplerisk'@'localhost'"
Write the connection details into the configuration file, then delete the schema file, which has no further use.
sed -i "s/\(DB_HOSTNAME', '\)__DB_HOSTNAME__/\1127.0.0.1/; s/\(DB_PORT', '\)__DB_PORT__/\13306/; s/\(DB_USERNAME', '\)__DB_USERNAME__/\1simplerisk/; s/\(DB_PASSWORD', '\)__DB_PASSWORD__/\1${DBPASS}/; s/\(DB_DATABASE', '\)__DB_DATABASE__/\1simplerisk/; s/\(USE_DATABASE_FOR_SESSIONS', '\)__USE_DATABASE_FOR_SESSIONS__/\1true/" \
  /var/www/simplerisk/includes/config.php
grep -c -E "'__[A-Z_]+__'" /var/www/simplerisk/includes/config.php
rm /var/www/simplerisk/database.sql
The grep -c should print 0, meaning no __PLACEHOLDER__ value is left in the file. To confirm the schema went in, count the tables.
mysql -N -e "SELECT COUNT(*) FROM information_schema.tables WHERE table_schema='simplerisk'"
Any number above zero means the import ran (155 when this guide was verified).

The database password now lives only in config.php. If you want a copy for your password manager, print it with echo "$DBPASS" before you close the shell.
6. Point Apache at SimpleRisk
Replace the default HTTP site with one that serves SimpleRisk and sends every request to HTTPS.
cat > /etc/apache2/sites-available/000-default.conf <<'EOF'


    DocumentRoot /var/www/simplerisk RewriteEngine On RewriteCond %{HTTPS} !=on RewriteRule ^/?(.*) https://%{SERVER_NAME}/$1 [R,L]

EOF
sed -i 's|/var/www/html|/var/www/simplerisk|g' /etc/apache2/sites-available/default-ssl.conf
SimpleRisk relies on .htaccess files to protect its own directories, so Apache has to honor them. This drop-in turns that on and switches off directory listings.
cat > /etc/apache2/conf-available/simplerisk.conf <<'EOF'


    AllowOverride All Require all granted Options -Indexes

EOF
a2enconf simplerisk
Tighten two defaults: restrict Apache to TLS 1.2, and stop it announcing its version.
sed -i 's/\(SSLProtocol\) all -SSLv3/\1 TLSv1.2/' /etc/apache2/mods-enabled/ssl.conf
sed -i 's/\(ServerTokens\) OS/\1 Prod/; s/\(ServerSignature\) On/\1 Off/' /etc/apache2/conf-enabled/security.conf
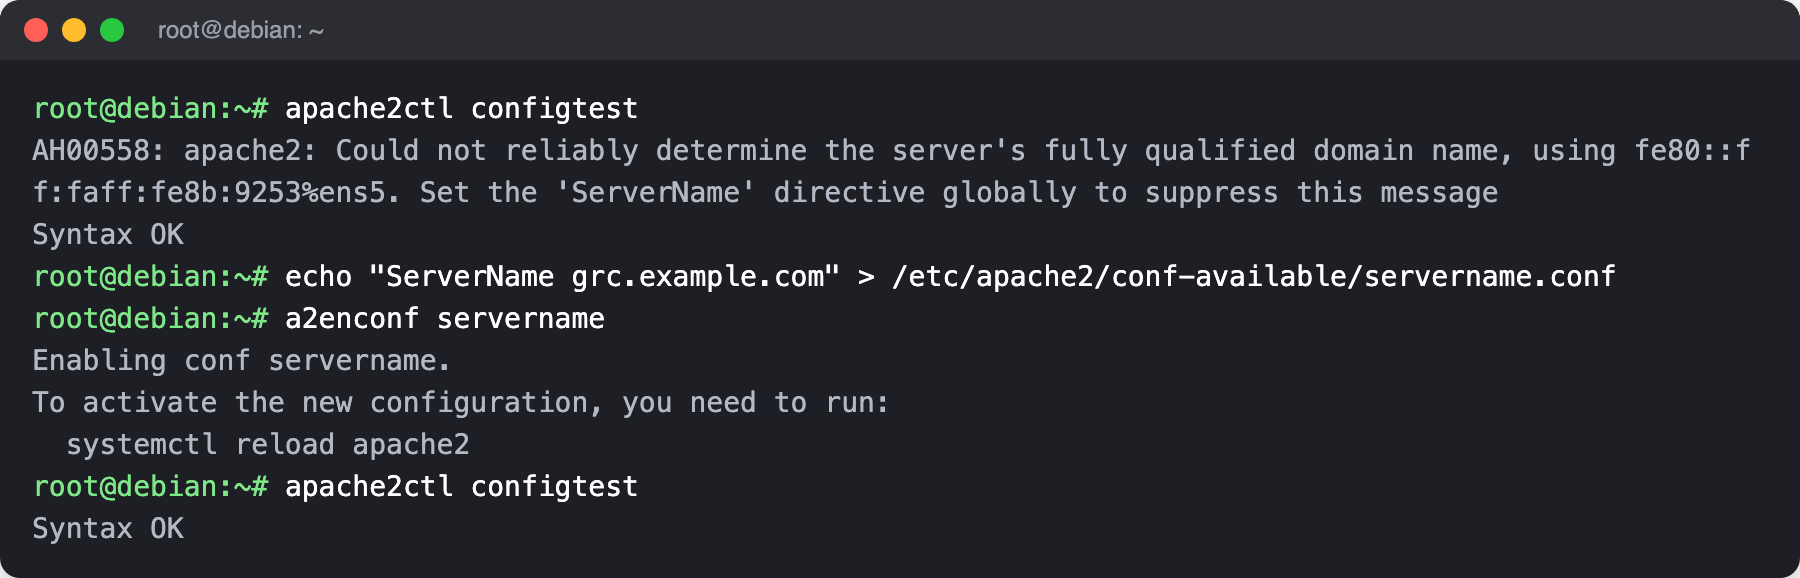
When a server's hostname doesn't resolve to an address, as on many fresh cloud images, Apache complains about its own name every time it starts or you test its configuration (AH00558). It's a warning, not an error. Silence it by telling Apache its name once.
echo "ServerName {your-simplerisk-host}" > /etc/apache2/conf-available/servername.conf
a2enconf servername
apache2ctl configtest
systemctl restart apache2
configtest must end with Syntax OK. Before the ServerName line it prints the AH00558 warning above that; after it, only Syntax OK. If it ends with anything else, read the message before restarting, because a failed restart takes the site down.
7. Create the log directory and the scheduled job
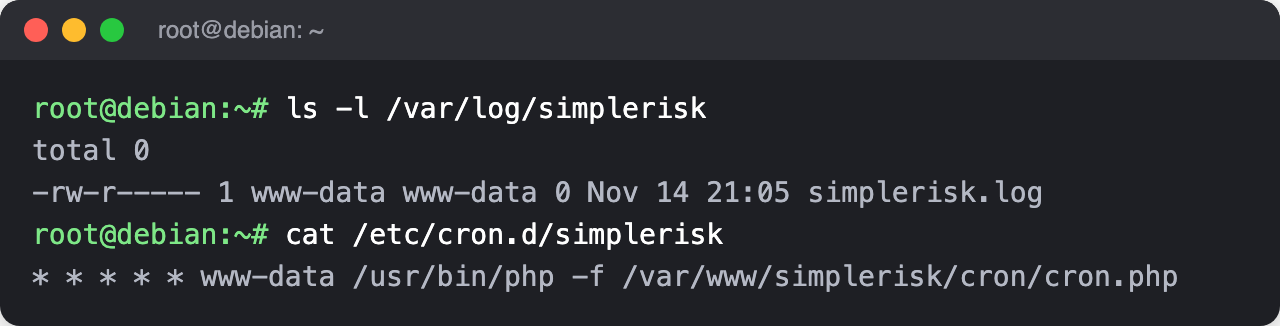
SimpleRisk writes its application log to /var/log/simplerisk. The directory belongs to the web server's account, with no access for anyone else.
mkdir -p /var/log/simplerisk
touch /var/log/simplerisk/simplerisk.log
chown -R www-data: /var/log/simplerisk
chmod 750 /var/log/simplerisk
chmod 640 /var/log/simplerisk/simplerisk.log
The scheduled job runs every minute as the web server's account, never as root. It's what sends notifications, runs queued background work, and takes backups, so a missing job shows up as features that quietly never fire. See The Cron Jobs for what it does.
echo "* * * * * www-data $(which php) -f /var/www/simplerisk/cron/cron.php" > /etc/cron.d/simplerisk
chmod 644 /etc/cron.d/simplerisk
Confirm both are in place.
ls -l /var/log/simplerisk
cat /etc/cron.d/simplerisk
8. Open the firewall
Allow SSH first. Enabling the firewall without it cuts off your own session.
apt-get install -y ufw
ufw allow ssh
ufw allow http
ufw allow https
ufw --force enable
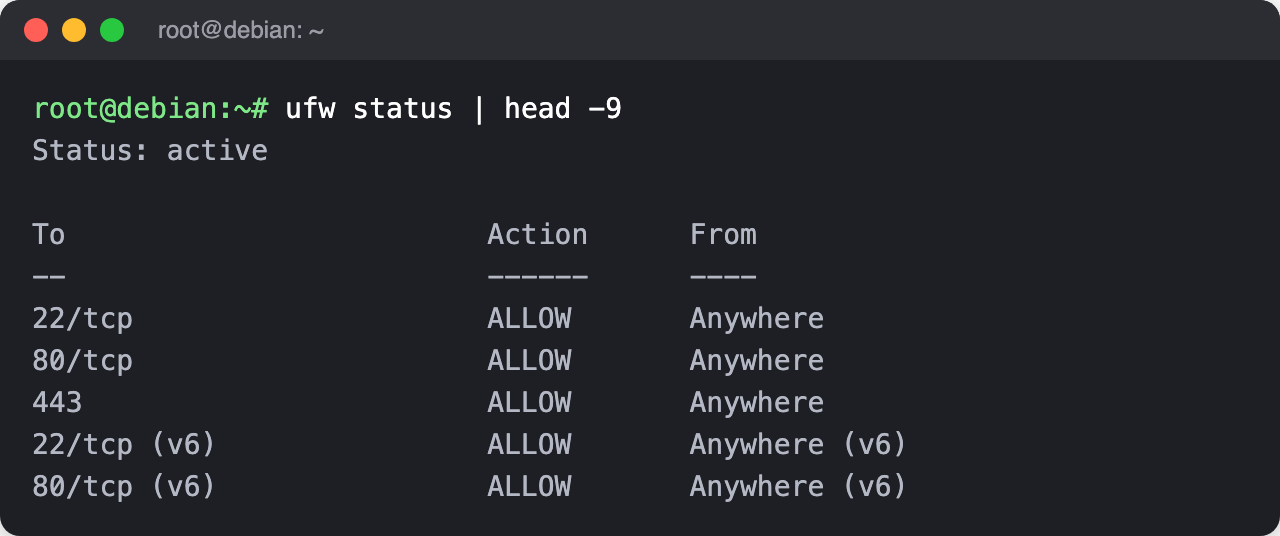
ufw status
The status should read active, with SSH (22), HTTP (80), and HTTPS (443) allowed.
9. Check the install, then finish in the browser
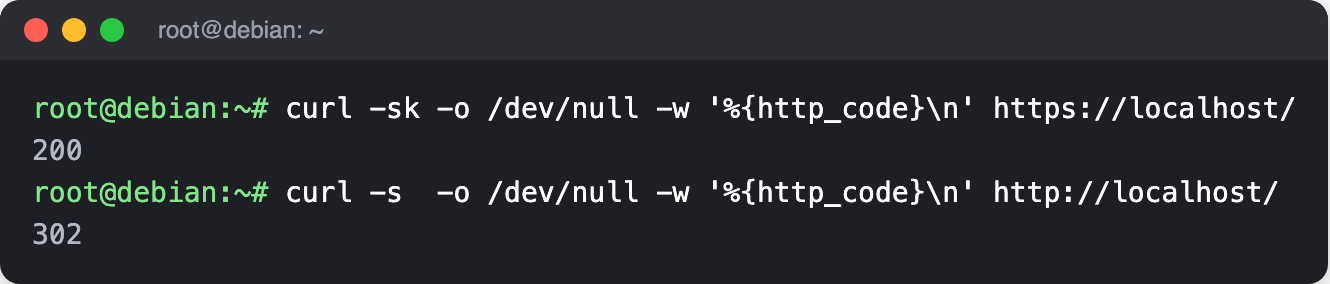
From the server, confirm both ports answer. The -k accepts the self-signed certificate.
curl -sk -o /dev/null -w '%{http_code}\n' https://localhost/
curl -s  -o /dev/null -w '%{http_code}\n' http://localhost/
The first should print 200 and the second a redirect code such as 302.
Now open https://{your-simplerisk-host}/ in a browser. It will warn that the certificate isn't trusted, because of the self-signed certificate; accept it for now and replace the certificate when you reach HTTPS and TLS Configuration.
You won't see the installation wizard described in The Initial Configuration Wizard. The database and config.php are already in place, so SimpleRisk goes straight to creating the first administrator. Enter a username, your full name, an email address, and a strong password, twice. The mailing-list box is optional and starts unticked. Select CREATE.
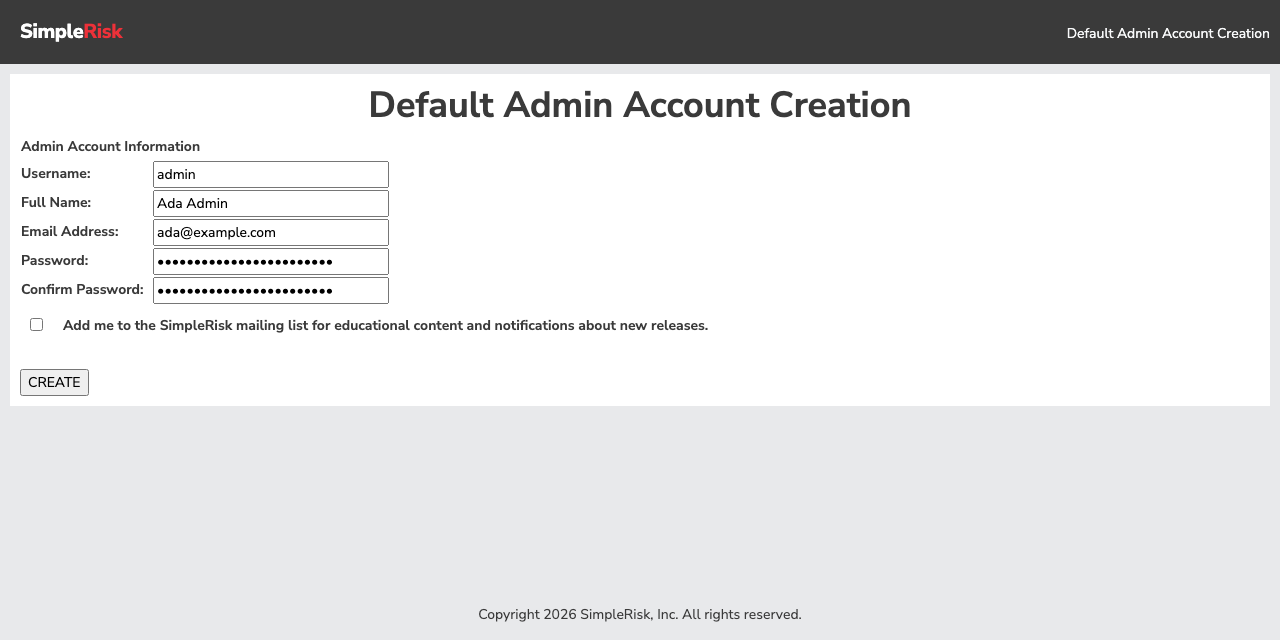
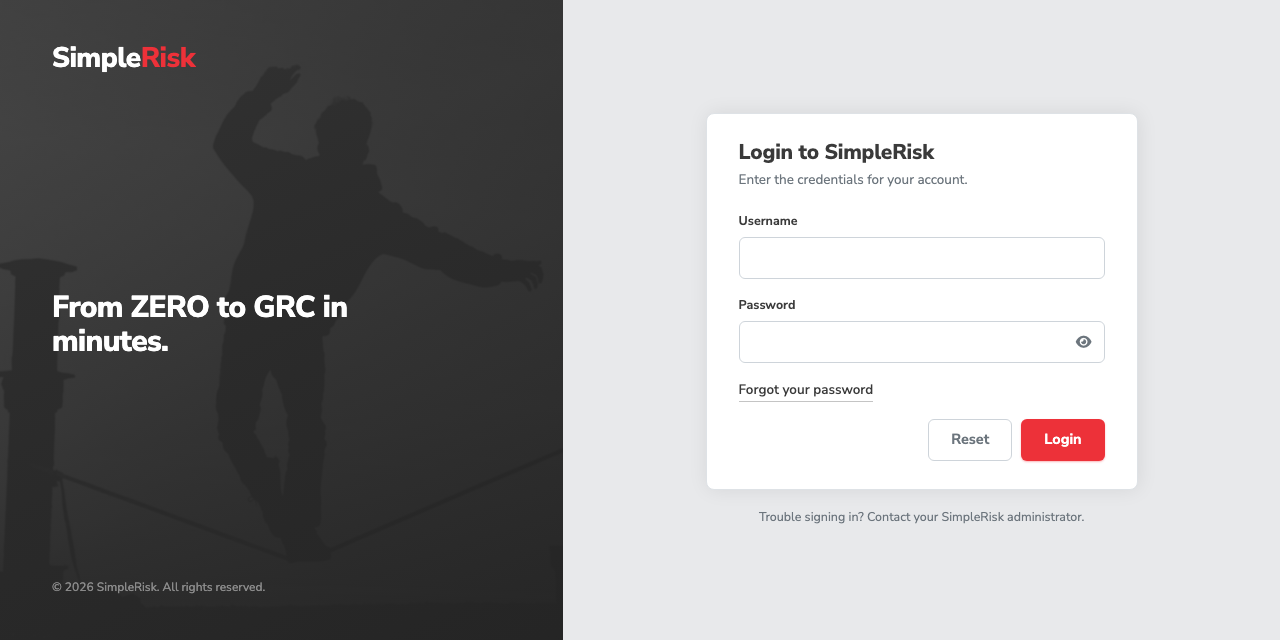
SimpleRisk then shows the login page. Sign in with the account you just created.
You land on the Home dashboard, with a Welcome to SimpleRisk card that lists the first steps. The counters read zero because nothing has been entered yet.
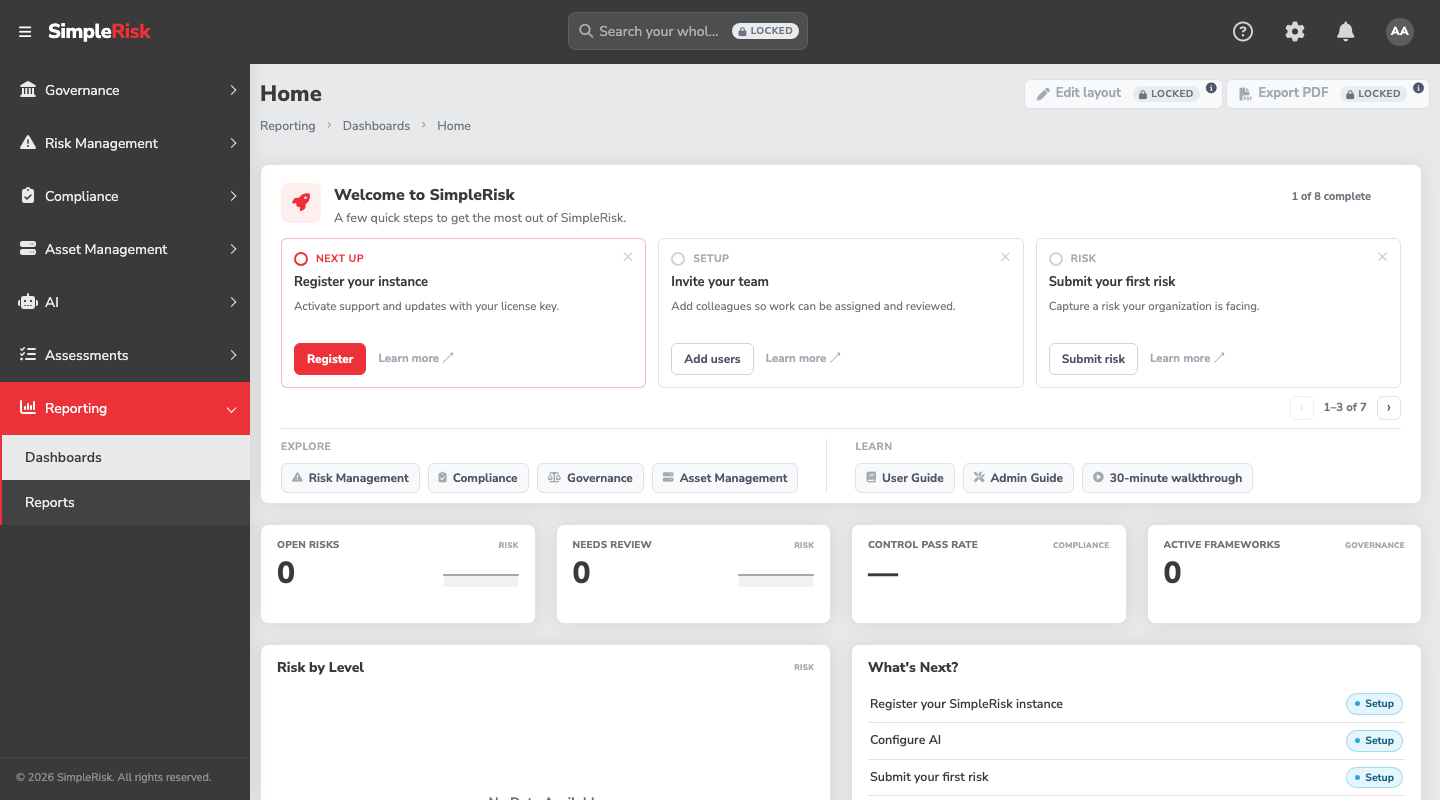
From here, register the instance so it can receive updates, following Registration and Licensing.
Common pitfalls
- Running the commands as a normal user with
sudoin front of only some of them. A redirect like> /etc/apache2/...happens in your shell, beforesudoapplies, and fails with "permission denied". Use one root shell for the whole article. - Skipping the fingerprint checks in Step 1. They're the only thing standing between a typo in a URL and a malicious PHP or MySQL package on your server.
- Installing Debian's own database instead. Debian 13's repositories carry MariaDB, which SimpleRisk doesn't support. Use
mysql-serverfrom the repository you added in Step 1, and runmysql --versionto confirm it says MySQL. - Leaving the database password only in your shell history.
DBPASSdisappears when you close the shell. The copy that matters is the one inconfig.php; save a second one in your password manager now, not after a restart. - A site that loads but ignores its rules. If Step 6's
AllowOverride Alldidn't take, SimpleRisk still renders, but the directory protections its.htaccessfiles provide aren't in force. Confirm withapache2ctl -Sandapache2ctl -Mthat the site is the one you edited and thatrewriteis listed. - Looking for the installation wizard. A manual install skips it, as the last step explains. The first thing you'll see is the administrator form.
- Uninstalling by deleting
/var/www/simplerisk. The scheduled job from Step 7 keeps firing every minute and will recreate the log directory behind you. Remove/etc/cron.d/simpleriskfirst.