Why this matters
A reviewed risk that nobody plans to do anything about is a risk waiting to happen. Mitigation is the part of the workflow where the program decides what it's going to do, who's going to do it, when it's going to be done, and how much the work will reduce the risk. The plan is the thing the residual-risk score is computed from; without one, residual risk equals inherent risk and the dashboards show no improvement no matter how much real work the team has done.
The mitigation tab also enforces a discipline most programs need: separating "we hope this gets better" from "we have a named owner, a date, and a percent reduction estimate." The plan doesn't have to be detailed (a good first cut is two paragraphs and a date) but it has to exist, and it has to be on a single record the program can revisit. The other tabs of the risk view are for what the risk is; the mitigation tab is for what's being done about it.
The other thing worth knowing up front: SimpleRisk separates the planning of a mitigation from the acceptance of one. Planning is the first-line work of the risk owner or a delegate. Acceptance is a second-line sign-off that the plan, as written, is acceptable to the organization. The two permissions are separate (Able to Plan Mitigations and Able to Accept Mitigations), and the separation is what makes the workflow meaningful — a self-accepted mitigation is a self-graded test.
Before you start
Have these in hand before you open the mitigation form:
- The Able to Plan Mitigations permission on your account. Without it, the mitigation form is read-only and the Save Mitigation button does nothing. (See Permission Reference.)
- A risk that's been through management review. New submissions can be mitigated before review, but the workflow is cleaner when the score is locked in first — see Reviewing and Approving Risks. The risk also has to be open; closed risks can't have new mitigations planned against them.
- A named Mitigation Owner. The accountable person for executing the mitigation, who is sometimes (but not always) the same as the risk owner. The risk owner owns the risk; the mitigation owner owns the work to reduce it.
- A realistic Planned Mitigation Date. The date by which the mitigation will be in place, not "the date we'd like it to be done." Mitigations whose planned date has passed without an update show up on the dashboards as overdue, and that signal only works if the dates are honest.
- A defensible Mitigation Percent estimate. The percentage reduction the mitigation is expected to apply to the impact side of the risk score. SimpleRisk uses this number to compute residual risk; a 100% mitigation reduces the impact to zero, a 0% mitigation does nothing. Most plans land between 20% and 80%; anything claiming "100% mitigation" deserves a sanity check.
Step-by-step
1. Open the right page
There are two paths into the mitigation form:
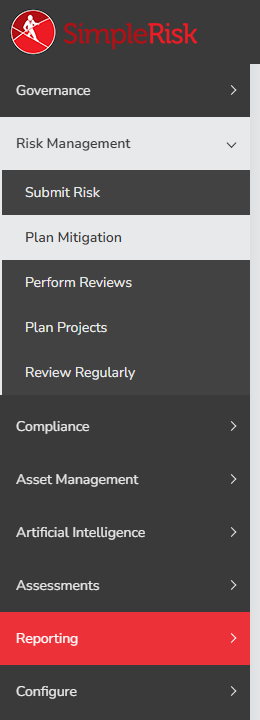
- Risk Management → Plan Mitigation opens
/management/plan_mitigations.php. This is the queue of risks awaiting first mitigation planning, populated by risks that have been management-reviewed but don't yet have a mitigation. Use this when the program is working through the planning backlog. - The risk's detail view at
/management/view.php?id=exposes the Mitigation tab on every risk, regardless of where it is in the workflow. Use this when you're updating an existing mitigation or planning one for a specific risk you already have open.
The two paths reach the same form. The queue is for batch work; the detail view is for individual edits.
2. Open the mitigation form
From the queue, click any row to open that risk's detail view at the Mitigation tab. From the detail view directly, click the Mitigation tab. The form layout is consistent in both cases: a left column for the people-and-timing fields, a right column for the planning narrative, and a Mitigation Percent field that drives the residual-risk calculation.
3. Fill in the planning fields (left column)
The left column captures who, when, how much:
- Planned Mitigation Date — when the mitigation will be in place. Date picker. Required for the mitigation to count as planned.
- Mitigation Owner — single-user picker. The person accountable for executing the mitigation. Defaults to the risk owner but is editable; in larger organizations the mitigation owner is often a different person from the risk owner (the risk owner is the business stakeholder; the mitigation owner is the implementer).
- Mitigation Team — multi-select. Teams whose work is involved in carrying out the mitigation.
- Mitigation Effort — dropdown of effort categories (configurable per install; common seeded values are Small, Medium, Large). Used in dashboards that show effort-vs-impact tradeoffs.
- Mitigation Cost — dropdown of cost ranges (configurable per install). Used the same way.
- Planning Strategy — dropdown of strategy categories (also configurable; common seeded values are Mitigate, Accept, Transfer, Avoid). The selection records what kind of mitigation this is, not just how it's executed.
4. Fill in the planning narrative (right column)
The right column captures the substance of the plan:
- Current Solution — textarea. What's already in place that partially addresses the risk. The "before" state.
- Security Requirements — textarea. What the mitigation needs to deliver — the requirements the implementer is committing to meet.
- Security Recommendations — textarea. Additional measures recommended above and beyond the requirements; the "above and beyond" list.
These three are textarea fields with no length limit beyond the database column. Keep them concrete: "Quarterly access review for all admin accounts in the customer-data subsystem" beats "Improve access reviews."
5. Set the Mitigation Percent
Below the two columns, the Mitigation Percent field is the number that drives residual-risk math. Move the slider (or type the percent) to the value the plan is expected to achieve. Conventions vary by program; ask your second line for the calibration anchors if you're not sure. The number affects every downstream report; getting it directionally right matters more than getting it precisely right.
A few rules of thumb most working programs land on:
- 0% is the right number if no mitigation is planned (which is also the right time to consider whether this should be an accepted risk via the Planning Strategy field rather than a mitigated one).
- 20%–40% is reasonable for a mitigation that improves controls but doesn't materially change the risk's surface area.
- 50%–70% is reasonable for a mitigation that materially changes the risk's likelihood or impact (replacing a vulnerable system, adding a compensating control that addresses the dominant attack path).
- 80%–95% is reasonable for a mitigation that addresses the dominant root cause but leaves residual exposure.
- 100% is rarely correct. A mitigation that genuinely brings residual to zero is usually a risk that should be closed via the close workflow, not a mitigated open risk.
6. Save the mitigation
Click Save Mitigation. SimpleRisk records the mitigation against the risk, sets the risk's status to Mitigation Planned if this is the first mitigation, recomputes the residual-risk score using the new Mitigation Percent, and writes an audit-trail entry noting the save. The detail view refreshes with the new mitigation visible and the residual score updated.
For programmatic mitigation submission (useful when integrating with a project-management tool that creates the mitigation plan elsewhere), the v2 API exposes the operation at POST /api/v2/risks/{id}/mitigations (POST creates, PATCH updates), with the same field set as the form. The current mitigation can be fetched at GET /api/v2/risks/{id}/mitigations.
7. Accept (or reject) the mitigation
A planned mitigation isn't a finalized one until a second-line user with the Able to Accept Mitigations permission signs off on it via the Accept Mitigation button on the same tab. Accepting locks the plan in as the agreed treatment for the risk and moves the risk through the workflow to its post-acceptance state. Rejecting (Reject Mitigation) sends it back for revision — common when the plan as written under-specifies the Security Requirements or over-claims on Mitigation Percent.
The accept/reject step is what makes the workflow second-line work rather than self-grading. Skipping it (some installs disable the requirement via admin settings) collapses the separation into a single first-line action; that's an explicit choice for smaller programs but worth noticing as a tradeoff rather than a default.
Common pitfalls
A handful of patterns recur across customers when mitigation planning misfires.
-
Confusing risk owner with mitigation owner. The risk owner is the business stakeholder accountable for the risk's outcome. The mitigation owner is the implementer accountable for getting the work done. They're often different people, and the form supports the split for a reason — collapsing them produces a workflow where the business owner is held accountable for technical work they can't actually perform, or vice versa. Use the two fields for what they're for.
-
Optimistic Mitigation Percent. New users often anchor at 80% or 90% because that's what the plan "should" achieve. Six months later, when the residual scores have been driving prioritization decisions, the program discovers the percentages were wishful and the prioritization was wrong. Calibrate against your own history: when prior mitigations have actually shipped, did they reduce the risk by what the percent claimed? If not, anchor lower. Honest 30% beats hopeful 80%.
-
Plan with no Planned Mitigation Date, or a placeholder date. A blank date doesn't appear on the overdue list because there's no date to compare to today. A "31 December 2099" placeholder also doesn't appear on the overdue list. Either pattern hides work the dashboards exist to surface. Pick a real date, even if the date is "best estimate, will refine." Update it when the estimate sharpens.
-
Mitigation as a place to write the risk description. The Current Solution and Security Requirements fields aren't for explaining what the risk is — that belongs in the risk's submission and on the Scoring tab. Mitigation fields describe what's being done, not what's wrong. Repeating the risk description in the mitigation field clutters the audit trail and makes the actual plan harder to find.
-
No accept/reject step. A program where the same person plans and accepts the mitigation isn't running the workflow as designed; it's running first-line work on both sides of the gate. The acceptance is the second-line confirmation that the plan is sufficient. If the program doesn't have a second-line reviewer, the workflow can be configured to skip acceptance — but the loss of independence should be acknowledged, not hidden.
-
Updating the mitigation without recording why. Each save overwrites the prior mitigation values and writes an audit log entry, but the audit entry doesn't explain why the change was made. When the planned date slips or the percent gets adjusted, add a one-line note to Current Solution or Security Recommendations explaining the change. Future you (or your auditor) will thank you.
-
Treating accepted mitigation as "the work is done." Accepting a mitigation says the plan is acceptable; it doesn't say the plan has been executed. The work itself happens after acceptance and reaches "done" only when the implementer reports back. The Mitigation tab doesn't track execution status by default — that's what the Tracking Risks Over Time review cycle is for.