In your SimpleRisk instance, you will find a menu option labeled Risk Management. By clicking this, you will be directed to the Risk Submission page. While only the Subject or Title of the Risk is mandatory for submission, we highly encourage you to provide as much detail as possible. This practice ensures that important information is not overlooked when you need to revisit the risk later. For instance, you might find it challenging to locate a risk you are tracking if you only recall the asset it impacts but cannot remember its name and did not enter it. Therefore, it is advisable to include comprehensive information when submitting risks.
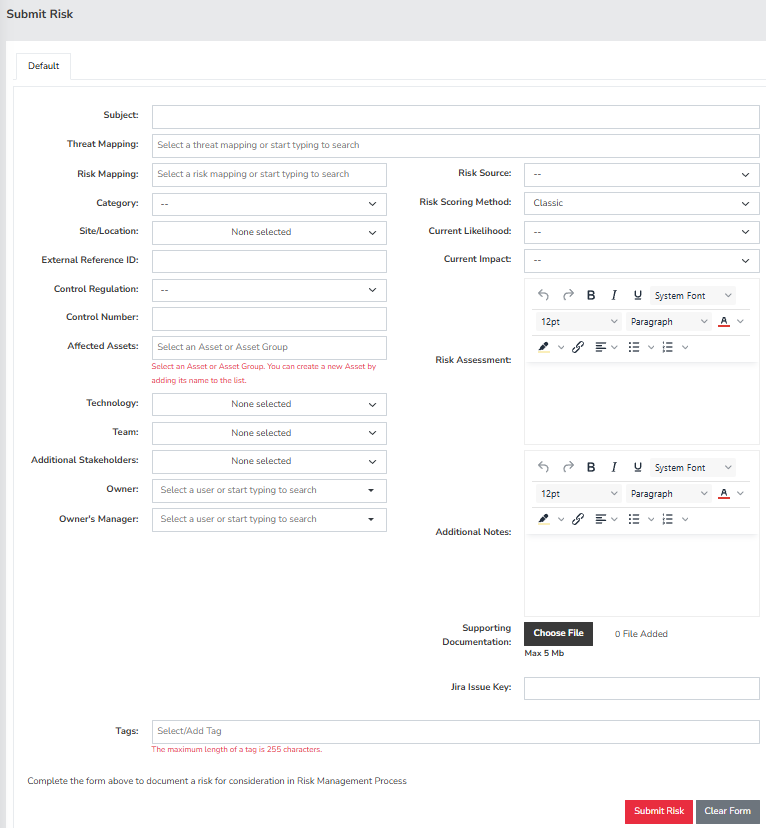
For Risk Submmision page, you can customize all values in the dropdown menus by accessing the “Configure” menu on the left, expanding it, and then selecting the “Add and Remove Values” panel. The fields that can be filled in, except for “Affected Assets,” are specific to each risk submission. The “Affected Assets” box maintains a record of all previously entered assets, allowing you to select them again by using the arrow keys after clicking on the dialogue box.
Additionally, you have the option to upload supporting documentation by clicking “Choose File” located at the bottom of the right column. The default maximum upload size is set to 5MB. Should you need to adjust this limit, you can do so in the Configure menu on the left, expanding it and then selecting File Upload Size. If you need to reset the form at any point, simply click the “Clear Form” button at the bottom right of the screen. Once you have filled in all the available information, select the “Submit Risk” button located at the bottom right to save the risk into the system.
This concludes a brief overview on “How to Perform a Backup” in SimpleRisk. If any questions were left unanswered or could use more in-depth descriptions, please submit your feedback to our Customer Support email address which is support@simplerisk.com